
If you've ever bitten into a jar of homemade peach preserves in January or spooned out tomato sauce from a batch you put up in August, you already know why canning is worth it. There's something deeply satisfying about stocking your pantry with food you made yourself. But before you get to that part, you need to make sure your kitchen is set up with the right canning equipment and supplies - and that's where a lot of beginners get tripped up.
This guide walks you through exactly what you need, what you can skip, and how to make smart choices so you're not wasting money on gear that doesn't fit your kitchen or your goals.
Start With the Basics: Understanding What You Actually Need
Canning falls into two main categories - water bath canning and pressure canning. The method you use depends on the acidity of the food you're preserving. High-acid foods like jams, jellies, pickles, and most fruits can be safely processed in a water bath canner. Low-acid foods like vegetables, meats, and beans require the higher heat of a pressure canner to eliminate the risk of harmful bacteria.
Knowing this upfront saves you from buying the wrong supplies for canning your first batch.
Canning Equipment You Should Prioritize
1. The Right Canner
For beginners starting with jams or pickles, a water bath canner is the most practical first purchase. It's essentially a large pot with a rack inside that holds jars off the bottom during processing. Look for one made from heavy-gauge aluminum or stainless steel - it distributes heat more evenly and holds up season after season.
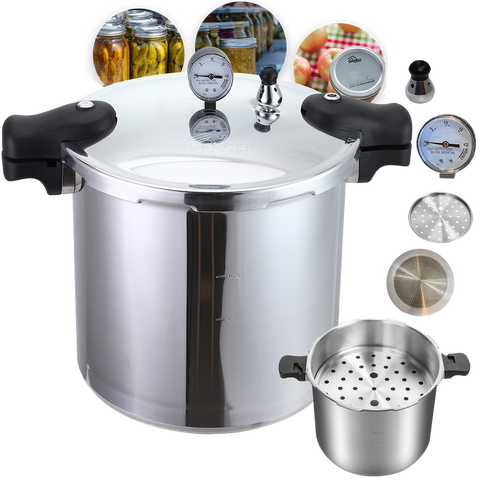
If you plan to preserve vegetables, soups, or meats, invest in a quality pressure canner. These have a locking lid, a pressure gauge, and a vent pipe. They're not cheap, but they're built to last decades if you care for them properly.
2. Canning Jars
This is the one canning supply you'll use over and over. Mason-style glass jars come in multiple sizes - half-pint, pint, quart, and half-gallon - and choosing the right size matters more than most people think. Jelly goes into half-pints. Whole tomatoes and peaches are easier to process in quarts. Pickles fit nicely in pints.
Always inspect jars before each use. Even a small chip on the rim can prevent a proper seal and ruin an entire batch.
3. Lids and Bands
Standard two-piece lids consist of a flat lid with a sealing compound and a screw band. The flat lids are single-use - the sealing compound compresses during processing and can't reliably re-seal after that. Bands, however, can be reused as long as they're rust-free and undamaged.
Some canners are switching to reusable lid systems, which work well but require a bit more care and attention during processing.
4. A Canning Funnel
This is one of the most underrated canning items in the kitchen. A wide-mouth funnel fits right into your jar and lets you fill it cleanly without dripping down the sides. That matters because residue on the jar rim can interfere with sealing.
5. Jar Lifter
A jar lifter is non-negotiable. Trying to pull a hot quart jar out of boiling water with tongs or oven mitts is a safety hazard. A proper jar lifter has rubberized grips that lock around the neck of the jar securely.
6. Bubble Remover and Headspace Tool
Air pockets trapped in a filled jar can cause issues with both sealing and preservation. A bubble remover - often a thin plastic or stainless tool - lets you run along the inside wall of the jar to release bubbles before putting the lid on. Many of these tools also have measurement markings that help you leave the correct headspace, which is the gap between the food and the lid.
7. Magnetic Lid Wand
Lids simmering in hot water need to be placed onto jars without touching the sealing compound with your fingers. A magnetic wand lifts the lid out of the water and sets it directly on the jar. It's a small tool that costs almost nothing but makes the process noticeably cleaner.
Smart Tips for Choosing Your Canning Supplies
Match your equipment to your volume. If you're canning a few dozen jars a year, a standard 21-quart water bath canner covers most home needs. If you're processing large harvests regularly, look for commercial-grade options with thicker walls and larger capacity.
Don't skip the quality of the jars. Off-brand jars can have inconsistent glass thickness, which raises the risk of breakage in the canner. Stick with well-established jar manufacturers and inspect each one before use.
Think about storage before you buy. Canners, especially pressure canners, take up serious cabinet space. Make sure you have somewhere to store your gear between seasons before committing to a large setup.
Build your supplies for canning gradually. You don't need every gadget at once. Start with a canner, jars, lids, a funnel, and a jar lifter. Add the rest as your skills and recipes expand.
What You Don't Need
The market is full of accessories marketed as essential that really aren't. Jar decorating kits, label sets, and specialty canning baskets are nice-to-haves, not must-haves. Focus your budget on functional gear first.
Choosing the Best Canning Supplies for Your Goals
The best canning supplies are the ones that match what you actually plan to make. A hobbyist making strawberry jam twice a year needs very different gear than someone preserving a 200-pound tomato harvest. Be honest with yourself about your volume, your storage space, and your budget.
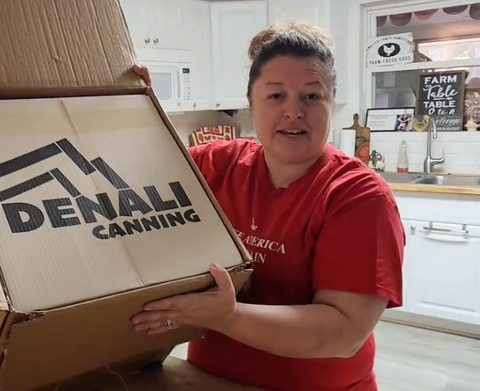
Once you have the right foundation in place, canning becomes one of the most rewarding kitchen skills you can develop. Denali Canning makes it easy to find quality equipment and supplies designed for real home canners - whether you're just getting started or looking to upgrade what you've been using for years.
Frequently Asked Questions
What is the difference between water bath canning and pressure canning?
Water bath canning is for high-acid foods like jams and pickles. Pressure canning is required for low-acid foods like vegetables and meats, reaching temperatures high enough to eliminate harmful bacteria safely.
How many jars do I need to start canning?
A good starting point is one to two dozen jars in mixed sizes. Pint and quart jars cover most recipes. You can always add more as you discover which sizes you use most often in your canning routine.
Can I reuse canning jar lids?
Standard flat canning lids are designed for single use only. The sealing compound compresses during processing and may not seal reliably a second time. Bands can be reused if they remain rust-free and undamaged after each season.
What headspace should I leave in a canning jar?
Headspace varies by recipe and food type, typically ranging from one quarter inch to one inch. Always follow tested recipe guidelines exactly, as incorrect headspace can affect the seal and the safety of your preserved food.
How do I know if a jar is sealed properly after canning?
After jars cool for 12 to 24 hours, press the center of each lid. A properly sealed lid will be firm and will not flex. Any lid that pops up and down has not sealed and should be refrigerated and used immediately.


Comments (0)
There are no comments for this article. Be the first one to leave a message!