
If you're just getting started with home food preservation, you've probably come across a long list of equipment you're supposed to have before you even open your first jar. Among all the canning tools out there, one item that often gets overlooked - or misunderstood - is the canning rack.
It's small. It's simple. And yet, skipping it or using the wrong one can compromise your entire batch. This guide breaks down exactly what a rack for canning is, why it matters, how it works, and what to look for when you're building out your home canning setup.
The Basics: What Is a Canning Rack?
A canning rack is a flat or basket-style rack that sits inside your canning pot or pressure canner, keeping your jars elevated off the direct heat of the bottom of the pot. Instead of sitting on bare metal, jars rest on the rack, which allows water or steam to circulate evenly around every jar during processing.
There are two primary types you'll encounter:
Water bath canning racks are typically round wire racks designed to fit inside a large stock pot or dedicated water bath canner. They usually have handles that allow you to lower and raise an entire load of jars at once, which makes the process much safer and more efficient.
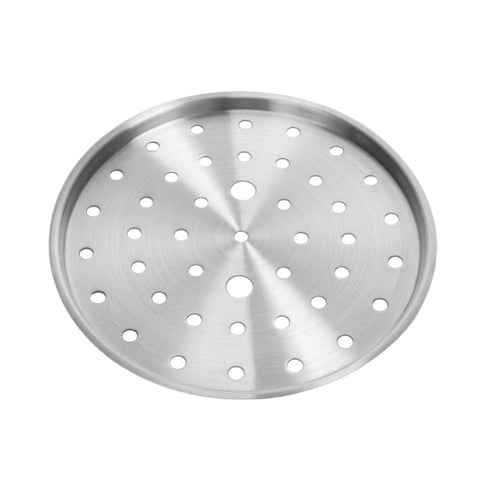
Pressure canning racks are flat, perforated metal discs that sit at the bottom of a pressure canner. Their job is the same - keep jars off the bottom - but they're built to withstand the higher heat and pressure environment that pressure canning requires.
Both serve the same fundamental purpose: protecting your jars and ensuring even heat distribution throughout the canning process.
Why a Canning Rack Is Not Optional
Some beginners try to skip the rack by improvising - using folded kitchen towels, rubber bands, or just placing jars directly on the pot floor. This is a mistake, and here's why.
When glass jars sit directly on the bottom of a pot, they're exposed to intense, uneven heat from a concentrated heat source. This creates thermal shock - a sudden temperature difference between the bottom of the jar and the rest of it - which can cause jars to crack or shatter mid-process. Beyond safety, cracked jars mean ruined food, wasted effort, and potential injury.
The rack acts as a buffer. It lets boiling water or steam move underneath and around the jars, distributing heat uniformly. This uniform heat is what makes the seal reliable and the preservation safe.
For anyone investing in proper canning equipment and supplies, a quality rack is one of the most cost-effective pieces you can add to your setup.
How a Canning Rack Works Step by Step
Understanding the mechanics helps you use it correctly every time.
Step 1 - Place the rack inside your pot or canner.
Before adding water, set your rack at the bottom of your water bath canner or pressure canner. Make sure it sits flat and stable.
Step 2 - Fill with water to the appropriate level.
For water bath canning, water should cover jar lids by at least one to two inches. For pressure canning, you typically add two to three inches of hot water before placing the rack and jars inside.
Step 3 - Load your filled jars onto the rack.
If you're using a basket-style rack, load your jars in, then carefully lower the whole basket into the water using the attached handles. If you're using a flat pressure canning rack, place jars one at a time using a jar lifter - another essential among your canning tools.
Step 4 - Process according to your recipe.
Once the lid is on and your pot reaches the correct temperature or pressure, the rack continues doing its job - keeping jars stable and allowing consistent heat circulation.
Step 5 - Remove jars carefully.
After processing, use your jar lifter to remove jars and place them on a clean towel to cool. Never place hot jars directly on a cold surface - the thermal shock risk doesn't disappear after canning is done.
Choosing the Right Rack for Your Setup
Not every rack fits every pot, and the differences matter more than people realize.
Size and fit are your first considerations. A rack that's too small will let jars tip or jostle. One that's too large won't sit properly inside the pot. Always match the rack diameter to your specific canner.
Material matters too. Stainless steel racks resist rust, handle high temperatures well, and last for years with proper care. Coated wire racks are common and more affordable but can chip over time, especially with heavy use.
Basket vs. flat design comes down to personal preference and your pot type. Basket racks with fold-down handles are extremely convenient for water bath canning because they let you manage multiple jars safely in one motion. Flat racks are standard for most pressure canners.
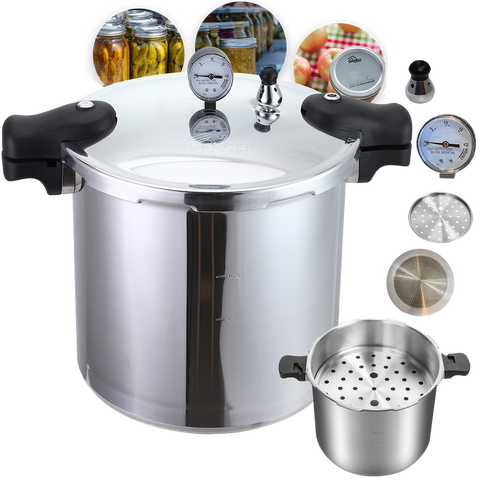
If you're in the market for a pressure canner for sale, check whether it includes a rack. Most quality canners do, but entry-level models sometimes don't - meaning you'll need to source one separately. At Denali Canning, the equipment is designed with the home preserver in mind, ensuring that what you get is complete and ready for real use.
Other Essential Canning Items to Pair With Your Rack
A rack works best when it's part of a complete, thoughtful setup. Here are the other canning items that belong alongside it:
Jar lifter - The most important companion to your rack. A wide-grip, rubberized jar lifter lets you safely move hot jars in and out of the canner without burning yourself or dropping anything.
Canning funnel - Keeps the jar mouth clean during filling, which is critical for getting a proper seal. Residue on the rim can prevent the lid from seating correctly.
Lid wand or magnetic lid lifter - Helps you handle lids hygienically without touching the sealing compound, which can be damaged by hand oils.
Bubble remover and headspace tool - Removes trapped air bubbles inside the jar and measures the correct headspace before sealing.
Canning lids and bands - Fresh, unused lids are non-negotiable for every batch. Bands can be reused if they're in good condition, but lids should always be new.
Together, these canning equipment and supplies form the foundation of safe, reliable home preservation. Cutting corners on any one of them introduces risk that's just not worth it.
A Note on Safety and Best Practices
Home canning has been practiced safely for generations - but only when done correctly. The USDA and the National Center for Home Food Preservation provide tested recipes and processing times that are grounded in food science. Always follow tested guidelines, never improvise processing times, and when in doubt, err on the side of caution.
Your rack is the first line of physical protection in that process. It's not glamorous, but it's foundational.
At Denali Canning, the focus has always been on giving home canners equipment they can rely on - tools built for real kitchens and real preservation goals, not just aesthetics. Whether you're stocking up on canning items for your first season or upgrading worn-out gear, starting with a proper rack is always the right move.
Frequently Asked Questions
1. Can I use any pot with a canning rack for water bath canning?
You can use a large stockpot as long as it's deep enough to cover jar lids by one to two inches of water. Always pair it with a properly sized rack to keep jars stable and allow even heat circulation throughout processing.
2. Do pressure canners come with a rack included?
Most quality pressure canners include a flat rack. However, some budget models do not. When shopping for a pressure canner for sale, always confirm whether a rack is included or needs to be purchased separately as an add-on item.
3. What happens if I can without a rack?
Jars placed directly on the pot floor are exposed to intense, uneven heat, which causes thermal shock. This can crack or shatter glass jars during processing and create unsafe seals that put your preserved food at serious risk.
4. How do I know if my canning rack needs to be replaced?
Check for rust, bent wires, chips in the coating, or warping. Damaged racks don't distribute weight or heat evenly. Replace any rack that looks worn - it's one of the most affordable canning equipment and supplies upgrades you can make.
5. Are canning racks/dishwashers safe?
Most stainless steel canning racks are dishwasher safe. Coated wire racks should be hand-washed to prevent chipping. Always check the manufacturer's care instructions and dry thoroughly before storage to prevent rust buildup between uses.


Comments (0)
There are no comments for this article. Be the first one to leave a message!