
Before you load your first batch of jars, it helps to understand which canning materials your setup actually needs. Most people start with the basics and figure out the gaps later. When it comes to pressure canning specifically, those gaps matter more than people expect, because pressure canning puts your equipment through conditions that water bath canning never does.
This post covers the canning materials that make the biggest difference in a pressure canning setup, including one item that tends to get overlooked until something goes wrong: the rack for canning.
Pressure Canning Uses the Same Jars, But Not the Same Rules
Water bath canning tops out at 212 degrees Fahrenheit. Pressure canning pushes well past that, reaching 240 degrees Fahrenheit or higher inside the canner. That extra temperature is what makes it the only safe method for low-acid foods like green beans, chicken, soups, and stews.
The higher heat also changes what you need in terms of canning materials. Jars that looked fine last season can develop hairline cracks under pressure. Lids that sealed well in a boiling water bath may not perform the same way in a pressure canner. And a rack that works in one type of setup does not always translate to another. Understanding these differences before you start is what separates a safe, successful batch from a wasted afternoon.
Start with the Right Canner
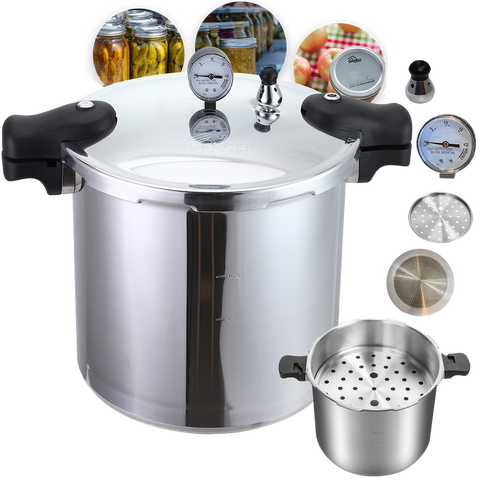
All of your canning materials are only as reliable as the canner holding them. A canner built with heavy-gauge aluminum or stainless steel holds pressure steadily across an entire batch and delivers consistent heat to every jar. Thinner, cheaper units struggle to maintain pressure, which means your jars may not reach the temperature required for safe processing.
If you are still working through that decision, the guide on choosing the right pressure canner walks through what to look for based on batch size, stovetop type, and how often you plan to can.
Why a Rack for Canning Matters More Than Most People Think
Of all the canning materials in a pressure canning setup, the rack is the one that gets skipped most often. Most canners come with a single rack included. That is enough if you are running one layer of jars. But if your canner holds two layers, you need a second rack for canning to separate the layers safely.
Without that second rack, the jars on top have no stable platform. They shift during processing, contact each other, and risk tipping entirely. That is a safety issue and a batch loss waiting to happen.
There is also a heat distribution issue. A rack for canning keeps jar bottoms elevated off the canner floor, which prevents direct contact with the heat source. Without it, the bottom of each jar heats unevenly, and uneven heating leads to incomplete processing, thermal shock, and in some cases, cracked glass. The rack allows steam to circulate fully around every jar, which is the whole point of the pressure canning process.
Lids, Rings, and Jars: What to Check Before Every Batch
These are the canning materials that most people already own, but owning them and using them correctly are two different things. Lids are single-use. The sealing compound on the underside of each lid is designed to form one seal, and reusing it after processing significantly increases the chance of failure. A fresh lid for every batch is not optional; it is how pressure canning is meant to work.
Rings should be checked for rust, dents, or warping before they go on the jar. A damaged ring prevents the lid from venting properly during processing, which disrupts the seal as the jar cools. Inspect the jar rims too. Chips and cracks that barely register to the eye can crack fully under pressure and ruin the seal before the batch is done.
For dense foods like whole vegetables and chunks of meat, wide-mouth jars make packing easier and more consistent. Consistent packing leads to consistent headspace, and consistent headspace leads to better seals across the board.
The Supporting Canning Materials That Tie It All Together
Once you have the foundational canning materials sorted, a few supporting tools make the whole process cleaner and more consistent. A headspace tool removes the guesswork from jar filling. Too little headspace and the lid cannot seat properly. Too much and the food may discolor or float. A canning funnel keeps jar rims free of residue before the lid goes on, which is one of the most common causes of a failed seal.
A jar lifter rated for full quart jars is worth having specifically for pressure canning. Jars coming out of a pressure canner retain more heat than those from a water bath, and a proper lifter keeps your hands clear. You can browse the full selection of canning materials built for home preservation, from racks and lids to the accessories that make every step easier.
Knowing Your Equipment Before the First Batch
Having the right canning materials is half the equation. The other half is understanding how your canner behaves. Pressure canning involves a sequence of steps: venting steam, bringing the canner to pressure gradually, holding that pressure for the full processing time, and depressurizing safely before opening. Rushing any of those steps affects every jar in the batch.
If you are newer to the process, the step-by-step breakdown on how to use a pressure canner is worth reading before your first session. It covers the full sequence from setup to safe removal and is a good reference to come back to whenever something in the process feels off.
Build Your Setup Right the First Time
Pressure canning rewards people who pay attention to the details upfront. The right canning materials, a rack for canning that fits your setup, quality lids on every jar, and a few reliable supporting tools are what make the difference between a batch you can confidently put on the shelf and one you end up second-guessing.
Getting those pieces right does not take long once you know what to look for. And once you do, pressure canning becomes one of the most reliable and satisfying ways to stock a pantry through every season.
Conclusion
The best pressure canning results come from having the right canning materials in place before the first jar goes in. From a properly fitting rack for canning to fresh lids, inspected jars, and a reliable set of supporting tools, every piece of your setup contributes to the outcome. There are no shortcuts in pressure canning, but there is a clear path forward when you know what you actually need.
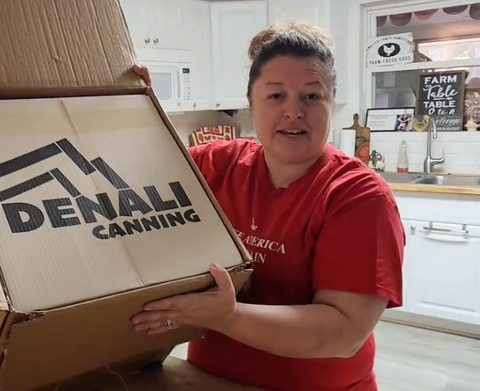
Denali Canning is built for home canners who want equipment that performs every single batch, from the rack at the bottom of the canner to the lid on the last jar of the season.
Frequently Asked Questions
What canning materials do I need specifically for pressure canning?
The core canning materials for pressure canning are a heavy-duty pressure canner, a rack for canning (and a second rack if your canner processes two layers), fresh single-use lids, rust-free rings, and properly inspected mason jars. Supporting tools like a headspace tool, jar lifter, and canning funnel round out the setup and help you work more consistently from batch to batch.
Do I need a second rack for canning if my canner already includes one?
Yes, if your canner is large enough to process two layers of jars. A second rack for canning separates the upper and lower layers, keeps jars stable during processing, and allows steam to circulate evenly around every jar. Running two layers without one creates instability at the top and uneven heat distribution across the batch.
Can I reuse canning lids for pressure canning?
No. Canning lids are single-use by design. The sealing compound on the underside forms one seal during processing and should not be relied upon for a second batch. Reusing lids is one of the most common causes of seal failure in pressure canning. Rings can be reused as long as they are free from rust, warping, or visible damage.
How much headspace should I leave when pressure canning?
Most tested pressure canning recipes call for one inch of headspace for low-acid foods like vegetables, meats, and soups. Some recipes specify a different amount depending on the food type, so always follow the recipe you are using rather than estimating. A headspace tool is one of the most useful canning materials you can add to your setup for this reason.
Why do jars sometimes fail to seal after pressure canning?
Most seal failures come down to one of four things: residue left on the jar rim, a nicked or chipped rim, a reused or damaged lid, or incorrect headspace. Wiping each jar rim with a clean damp cloth immediately before placing the lid is a simple step that prevents the majority of these issues. Inspecting your canning materials before every use catches the rest.


Comments (0)
There are no comments for this article. Be the first one to leave a message!