
You've got jars washed, produce prepped, and a countertop covered in mason jars ready to go. Before you load that first batch into the pot, though, there's a two-minute habit that separates a smooth canning day from a scary one: running your pressure canner safety checks. It sounds like an extra step when you're already itching to get started, but skipping it is exactly how gaskets fail mid-batch, gauges read wrong, and vent pipes clog without anyone noticing until steam is hissing somewhere it shouldn't. The good news is that a real safety check takes less time than loading your first rack of jars. You just need to know what to look at, in what order, and why each part matters.
Why Pressure Canner Safety Checks Aren't Optional
Pressure canning exists for one reason: low-acid foods like green beans, meat, broth, and most vegetables need higher temperatures than boiling water can reach to destroy the bacteria that cause botulism. A water bath canner can't get hot enough to do that job safely, no matter how long you process the jars. That's the entire point of the extra pressure, and it's also why pressure canner safety checks matter more here than almost anywhere else in the kitchen. A canner that's sealing wrong, venting wrong, or reading pressure wrong isn't just going to ruin a batch of green beans. It can leave jars under-processed in a way you'd never spot just by looking at them after the fact.
This isn't about being paranoid. It's about catching small, ordinary wear and tear before it becomes a problem, which is really what pressure canning safety comes down to in practice. A dried-out gasket or a hairline crack in a rim doesn't announce itself. If you want a deeper primer on the fundamentals before you dive into checks, Pressure Canning 101 walks through processing times, altitude adjustments, and the basics of how the whole system works together. Once you understand why each part exists, the checks themselves stop feeling like busywork and start feeling like common sense.
Check the Gasket and Sealing Ring First
The gasket is the rubber or silicone ring that creates the actual seal between your canner's lid and body, and it's the single most common point of failure in older or heavily used canners. Before every batch, run your finger around the entire ring and look for dryness, cracking, flattening, or any spot that feels stiffer than the rest. A gasket that's lost its flexibility won't compress evenly under pressure, which means steam finds the weak point and leaks out instead of building the pressure your recipe's processing time assumes you're getting.
Pull the gasket out completely if your model allows it, wipe it clean, and check the groove it sits in for stuck food debris or mineral buildup from hard water. Reseat it fully before closing the lid, since even a properly maintained gasket sitting slightly twisted or off-track can cause a seal that seems fine at first and then slowly loses pressure twenty minutes into your batch. Most manufacturers recommend replacing the gasket every one to three seasons depending on how often you can, and keeping a replacement gasket on hand means you're never tempted to run one more batch on a ring you already know is questionable.
Inspect the Pressure Weight and Vent Pipe
The vent pipe is the small tube that lets steam escape before you place the weight on top, and it has exactly one job: staying clear. Before every batch, hold the canner up to the light and look straight through the pipe to confirm nothing is blocking it, since even a small amount of dried food residue or a stray fiber from a dish towel can restrict the steam flow enough to throw off your pressure. This is exactly where pressure canning safety habits pay off, because a partially blocked vent is invisible from the outside until your gauge starts reading strangely.
Once the pipe is clear, check your pressure weight for any warping, buildup, or looseness in how it sits over the vent. A weighted gauge canner should let the weight rock and jiggle gently once it reaches pressure; if it's sitting dead still or rattling far more aggressively than usual, something's off with either the weight itself or the vent underneath it. Wipe both down with a damp cloth and confirm the weight seats flush before you start your timer.
Look at the Gauge, Lid Lock, and Safety Valve
If your canner uses a dial gauge instead of, or in addition to, a weighted one, it needs a different kind of check: accuracy testing. Dial gauges drift out of calibration over time, and a gauge reading five pounds low can mean your food never actually reaches a safe processing pressure even though everything looks correct. Most local extension offices will test a dial gauge for free, and doing this once at the start of each canning season is a smart habit even if you can't spot anything visibly wrong with it.
Beyond the gauge itself, check that the lid locks fully and evenly, with no gaps where the lid meets the rim on any side. Look at the overpressure plug or safety valve too, which is the small rubber piece designed to pop out if pressure builds dangerously high. It should look intact and pliable, not hardened or cracked. These are backup systems, and backup systems only work if you actually check them instead of assuming they'll be fine because they always have been before.
Don't Skip the Canner Body, Rim, and Rack
The metal body of the canner deserves its own once-over. Run your fingers along the rim where the lid seals and feel for any dents, chips, or warping, since even a small deformity here can prevent an even seal no matter how good your gasket is. Check the handles for looseness and make sure your rack sits flat on the bottom, since a wobbly canning rack can let jars tip or knock against each other during processing, which is how you end up with cracked jars and lost batches.
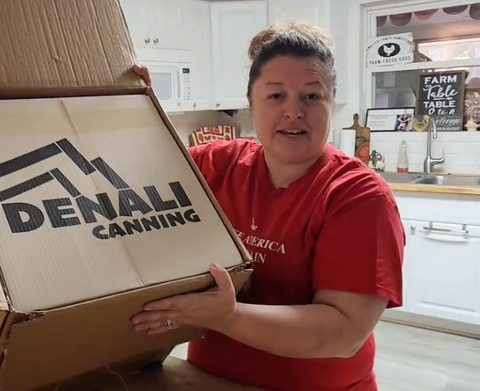
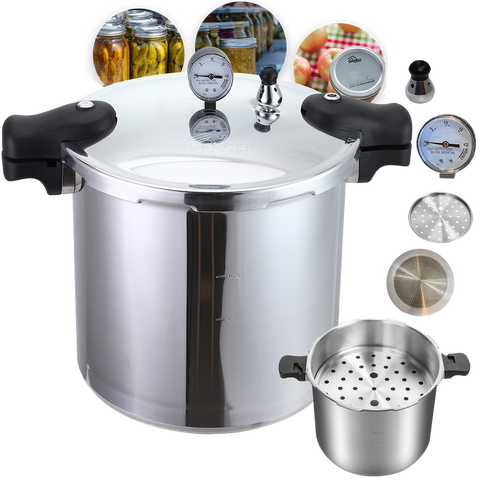
This applies whether you're working with a decades-old canner passed down from a relative or something newer, like Denali Canning, which was built with a locking lid and dual pressure options specifically to make some of these checks faster to run. Either way, add enough water before you start, since running a canner dry, even briefly, stresses the whole system in ways that aren't always obvious until later in the season.
Running through all five checks becomes second nature after a season or two, and that's really the whole of pressure canning safety in practice: five small habits, done in the same order, every single time you can. It takes less time than washing your jars, and it's the difference between a batch you trust on your shelf and one you're quietly unsure about. Build it into your routine now, and make pressure canner safety checks as automatic as checking your water level.
Frequently Asked Questions
1. What's the most important safety check before every canning batch?
If you only have time for one check, make it the gasket and the vent pipe, since these two components cause the most seal and pressure problems in practice. A cracked gasket or blocked vent can undermine your processing time in ways you won't notice until the jar's already sealed and stored.
2. How do I know if my pressure canner gasket needs replacing?
Look for cracking, flattening, dryness, or any spot that feels stiffer or less pliable than the rest of the ring. If it no longer sits snugly in its groove or shows visible wear after handling it, replace it rather than risk a slow leak mid-batch.
3. What happens if my pressure canner's vent pipe gets clogged?
A blocked vent pipe can prevent steam from venting properly before you add the weight, which throws off your pressure buildup and can leave your gauge reading inaccurately. Always hold the canner up to the light and look straight through the tube before every batch to confirm it's fully clear.
4. Should I use a dial gauge or a weighted gauge canner, and does the check differ?
Both are safe when properly maintained, but they need different checks. Weighted gauges need a visual inspection for warping or buildup, while dial gauges need periodic accuracy testing since they can drift out of calibration without any visible sign.
5. How often should I have my canner's dial gauge tested for accuracy?
Once at the start of every canning season is the standard recommendation, and most local extension offices offer this testing for free. If you can more than a few times a year, testing it mid-season isn't a bad idea either.
6. Can I skip these checks if I've been canning for years without an issue?
Experience helps you more efficiently, but it doesn't change how gaskets, vents, and gauges wear over time. A canner that's worked perfectly for ten seasons can still develop a hairline crack or a worn seal overnight, so the checks stay worth the two minutes no matter how long you've been doing this.





Comments (0)
There are no comments for this article. Be the first one to leave a message!