
Busy canning seasons can sneak up fast. One week you are planning recipes, and the next week the garden is overflowing, the farmer's market has boxes of produce, and the kitchen counter is full of jars waiting to be filled.
When that happens, the last thing you want is to realize you do not have enough lids, rings, racks, or supplies ready.
That is why buying canning lids & rings before the season gets hectic is one of the smartest things a home canner can do.
Lids and rings may seem like small supplies, but they perform different and important jobs during canning. The flat lid creates the seal, while the threaded ring, or band, keeps the lid positioned on the jar during processing.
Whether you are preparing jams, sauces, pickles, fruit, vegetables, broths, meats, or pantry staples, having the correct supplies ready can make the entire preserving season more organized.
Why Canning Lids & Rings Matter
Shelf-stable home canning depends on a reliable seal and on following a current tested recipe with the correct processing method.
The flat lid sits directly against the jar rim. During processing and cooling, the sealing compound helps create the vacuum seal that keeps the lid secured to the jar.
The ring has a different job. It holds the lid in position during processing.
After jars have fully cooled and the seals have been checked, rings are commonly removed for pantry storage. Removing them can make it easier to notice a failed seal and can help prevent moisture from remaining trapped around the band.
1. Know the Difference Between Lids and Rings
Before buying supplies, it helps to understand exactly what each component does.
The lid is the flat metal disc with sealing compound on the underside. It sits directly on the clean jar rim and forms the seal.
The ring, also called a band, is the threaded metal piece that screws onto the jar and holds the flat lid in place during processing.
The lid does the sealing. The ring does the holding.
Standard flat canning lids intended for one-time sealing should be new for each shelf-stable canning batch. Rings can generally be reused if they remain clean, undamaged, free of significant rust, and able to thread smoothly.
That means busy canners will usually need a larger inventory of flat lids than rings.
Explore Canning Supplies
Get the supporting supplies ready before tomatoes, fruit, vegetables, and other seasonal foods start filling the kitchen.
Shop Canning Supplies →2. Choose the Right Size: Regular Mouth or Wide Mouth
Home canning jars commonly use regular-mouth or wide-mouth openings. Buying a lid or ring that does not match the jar is an easy way to stop a canning session before it begins.
Regular-mouth jars are frequently used for jams, jellies, sauces, relishes, smaller pickled foods, and other products that are relatively easy to pour or spoon into the jar.
Wide-mouth jars have a larger opening, which can make them easier to fill and clean when working with larger pieces of food.
The most important rule is simple: buy the lid and band size that matches the jars you actually own.
Before ordering for the season, count your regular-mouth jars and wide-mouth jars separately.
3. Buy More Flat Lids Than You Think You Need
Busy preserving seasons have a way of getting bigger than planned.
A few extra pounds of tomatoes may become another sauce batch. Extra peaches may arrive from a neighbor. Green beans may mature all at once. Apples may go on sale at exactly the wrong time for your existing supply inventory.
Because standard flat lids are used for one sealing cycle, running out can bring the entire canning day to a stop.
Keeping additional lids available gives you room for unexpected harvests, failed seals that require properly reprocessing with a new lid according to tested guidance, and extra batches you did not originally plan.
Extra Lids Are Especially Useful During
4. Stock Rings Separately When Needed
Rings can often be reused, but they do not last forever.
A usable ring should thread smoothly onto the jar and hold the lid evenly during processing.
Bands can become rusty, bent, dented, or damaged during storage and repeated handling.
Before the season begins, inspect your existing collection instead of assuming every ring from last year is ready to use.
Sort Your Rings Into Three Groups
5. Consider Lids and Rings Bundles for Peak Season
Bundles can simplify seasonal buying because they let you restock multiple components at the same time.
The right ratio of lids to bands depends on how many reusable rings you already have and how quickly you move through batches.
If most of your rings remain in good condition, a lid-heavy restock may make the most sense.
If you are replacing old, rusty, or bent bands, a combination of lids and additional rings may be more useful.
Explore Canning Bundles
Simplify seasonal preparation with bundled canning options designed to bring useful supplies together.
Explore Canning Bundles →6. Inspect Every Lid Before Use
Even when using new supplies, inspect each lid before placing it on a jar.
The lid should be clean, flat, and free from damage that could interfere with the sealing surface.
Do Not Use a Lid With
Store unused lids according to the manufacturer's instructions and protect them from moisture, excessive heat, and anything that could bend them.
7. Inspect Rings Before the Season Starts
Rings deserve the same attention.
A band may appear usable until you try to thread it onto a jar. Testing questionable rings before the busy season can save time later.
Replace rings that are badly rusted, bent, warped, damaged around the threads, or unable to sit properly on the jar.
After each use, clean bands as needed and dry them thoroughly before storage to reduce the chance of corrosion.
8. Do Not Reuse Standard Flat Lids for Shelf-Stable Canning
Standard one-piece flat canning lids designed for a single sealing cycle should be replaced each time you process a shelf-stable batch.
Once the sealing compound has gone through processing and formed a seal, it may no longer provide the same reliable sealing performance when reused.
Previously used lids may still have non-canning uses, such as temporary refrigerator covers or dry storage, but they should not automatically be treated as new canning lids.
Food Safety Reminder: Always follow the lid manufacturer's directions and a current tested canning recipe from a trusted source. Use the correct processing method, jar size, headspace, processing time, pressure when applicable, and altitude adjustment for the food being preserved.
9. Apply Rings According to Canning Instructions
Buying the right supplies is only part of successful canning. Correct use also matters.
Bands are generally applied to hold the lid securely while still allowing the jar to vent appropriately during processing.
Over-tightening may interfere with normal venting, while a band that is not adequately secured may allow the lid to move.
Follow the jar and lid manufacturer's instructions for band tightness rather than using excessive force.
10. Match Supplies to Your Canning Style
Different households need different inventory levels.
A beginner processing a few weekend batches may need only a modest supply. Someone preserving a large garden, buying produce by the case, or pressure canning throughout the year may need significantly more.
Ask Yourself
11. Keep the Rest of Your Canning Equipment Ready
Lids and rings are essential, but they are only two parts of the preserving setup.
A worn gasket, missing rack, damaged jar lifter, or other forgotten tool can slow down a canning day just as quickly.
Useful Equipment to Check Before the Season
Review both the canner itself and the supporting parts before the busiest harvest weeks arrive.
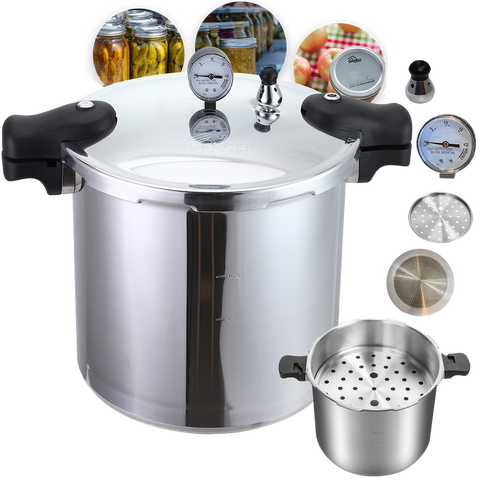
Explore Denali's pressure canning option for low-acid foods when used with an appropriate tested pressure-canning recipe.
View TANKER™ →Keep spare racks available for a more organized canning setup and replacement needs.
View Canning Racks →Inspect pressure-canner sealing components before the season and replace parts when the manufacturer recommends it.
View Replacement Gasket →Review the Pressure Canning Materials Guide
Build a more complete preserving setup by reviewing the tools and supplies commonly needed for pressure canning.
Read the Materials Guide →12. Store Lids and Rings the Right Way
Good storage protects supplies between batches and between seasons.
Keep unused lids clean, dry, and protected from bending or crushing.
Rings should also be completely dry before storage. Moisture left on metal bands can contribute to rust.
Separating supplies by size can make busy canning days much easier.
A Simple Storage System
13. Plan Ahead Before Peak Buying Season
The easiest time to discover that you are short on lids is before the produce is ready, not while a batch is already waiting on the counter.
Inventory your supplies before your busiest preserving months.
Buying early gives you time to confirm jar sizes, inspect reusable bands, check pressure-canner parts, organize the workspace, and replace missing equipment.
Busy season should be about processing food safely and efficiently, not searching for basic supplies at the last minute.
14. What to Buy for a Starter Seasonal Kit
Your exact supply list depends on your jar collection and the amount of food you plan to preserve, but a basic seasonal inventory may include both new lids and a supply of reusable bands.
Seasonal Canning Checklist
Key Takeaways
Conclusion
Busy canning seasons reward preparation.
When the garden is producing, produce is on sale, or harvest boxes are ready, you do not want to pause because the right lids or rings are missing.
Canning lids & rings may be small, but they are essential parts of the jar-sealing system. Fresh flat lids help create the seal, while properly fitting rings hold the lids in position during processing.
The best buying strategy is straightforward: know your jar sizes, keep enough new lids for every planned batch plus extras, replace damaged rings, organize regular-mouth and wide-mouth supplies separately, and inspect the rest of your canning equipment before peak season.
When the supplies are ready, canning days become easier to manage and you can focus on following your tested recipe and preserving the food in front of you.
Explore Denali Canning Resources
Find more guides on pressure canning, equipment, supplies, techniques, and preserving preparation.
Explore Canning Resources →




Comments (0)
There are no comments for this article. Be the first one to leave a message!