
Every home canner has that moment of doubt right before a batch: are the lids and rings for canning in that box actually still safe to use, or did last season's storage do more damage than you'd like to admit?
A few extra minutes of inspection before you fill a single jar can save you from a failed seal, wasted produce, or food that only looks safely preserved. Lids and rings seem simple, but rust, warping, and worn sealing compound can quietly ruin a canning session you spent all afternoon prepping for.
Before you load your canner, here's exactly what to check on your lids and rings for canning, and why skipping it is never worth the shortcut.
Why Inspecting Lids and Rings for Canning Matters
Even a brand-new box of canning lids can have a stray dud mixed in from manufacturing or rough handling during shipping. Used rings are a different story entirely. They get tossed in drawers, dropped on tile floors, and stacked under heavier jars for months at a time.
A ring that's slightly bent won't grip the lid evenly, which means uneven pressure on the sealing compound and a higher chance the jar never actually seals.
Lids are even less forgiving. The sealing compound around the rim is a one-time-use material designed to compress against the jar exactly once, so any lid that's already been used, dented, or exposed to moisture for too long is not a reliable choice for a new batch.
- Check rings for rust, dents, sharp edges, and warping.
- Make sure every ring sits completely flat.
- Inspect lid sealing compound for cracks or flattened areas.
- Set aside dented, damaged, or previously used lids.
- Keep replacement supplies ready before processing begins.
Replace Questionable Lids & Rings Before the Batch Starts
Fresh canning supplies are inexpensive compared with losing jars of food you've already spent hours preparing.
Shop Lids & Rings →Checking Your Canning Rings for Rust, Dents, and Warping
Start with the rings since you'll reuse them season after season. Hold each one up and look for rust spots, even small ones, since rust weakens the metal and can flake during processing.
Run a finger around the inside edge to feel for burrs or sharp spots that could nick the lid or your hand. Set the ring flat on a counter and check that it sits evenly without rocking, which is the easiest way to spot warping you might miss just by looking.
A warped ring won't apply consistent pressure around the entire lid, and that uneven pressure is one of the more common reasons a jar seems sealed at first but pops open in storage.
If you're stocking up for the season, a set of wide mouth rings gives you a clean baseline to compare your older stock against, so you know what a properly shaped band should look like before sorting through the rest of your pantry drawer.
Refresh the Rings You Use Most
Keep dependable replacement rings on hand so a bent or rusty band never forces you to compromise during canning day.
Explore Canning Rings →Signs a Canning Lid Won't Seal Properly
Lids deserve even more scrutiny than rings because the sealing compound is doing the real work. Flip each lid over and look at the rubber-like ring around the edge.
It should be smooth, evenly colored, and free of cracks or dry, brittle patches. If the compound looks flattened, discolored, or has any visible gaps, that lid has either already been used or has degraded from age and shouldn't go anywhere near a new batch.
Check the center of the lid too. It should have a slight, even dome to it. A lid that's already flat or dented in the middle may have taken a hit in storage that compromised the metal.
Denali Canning offers canning supplies designed for home preservation, but every lid should still receive a quick visual inspection before use. If you mostly work with standard jars, keeping fresh regular mouth rings nearby also gives you a reliable reference point when sorting older supplies.
Useful Supplies to Check Before Your Next Batch
Keeping fresh replacements nearby makes it easier to retire a questionable lid or ring instead of using it simply because you have nothing else ready.
Testing the Seal Before You Store a Batch
Inspection before you can is only half the job. After processing, you need to confirm each jar is actually sealed before you shelve it.
Once jars have cooled for a full twelve to twenty-four hours, press the center of each lid. It should feel firm and stay down. If it flexes or makes a popping sound when you press it, the jar didn't seal.
This step matters just as much as the inspection you did before filling the jars, because it catches lids that looked fine going in but didn't compress correctly during processing.
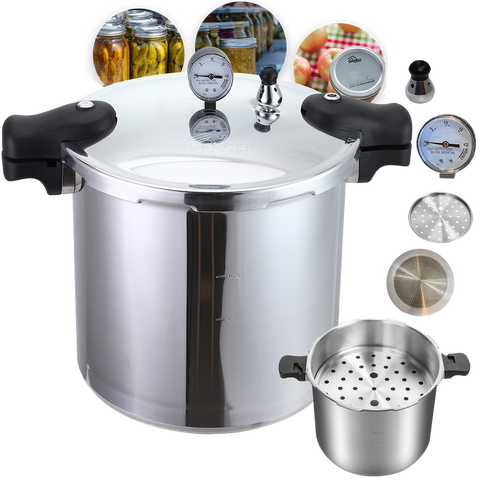
Keeping a full replacement gasket on hand for your pressure canner is smart for the same reason, since canner maintenance is another part of preparing reliable equipment before processing.
Keep a Replacement Gasket Ready Before You Need One
Lids and rings aren't the only equipment worth inspecting. Keeping replacement pressure-canner parts ready can prevent a worn component from interrupting canning day.
Shop Replacement Supplies →How Often to Replace Lids and Rings
Rings can last for years if you take care of them, but lids are single-use by design and should never go back into rotation once a jar has been opened.
That said, unused lids do have a shelf life too. Stored in a cool, dry spot, most sealing compounds stay reliable for around five years, but heat, humidity, and sunlight all speed up that clock.
If you bought a box of lids you can't quite remember purchasing, do the visual check outlined above before you trust it with a full batch.
For rings, replace any that show rust bleeding through the coating, since that's usually a sign the rust has already spread past what you can easily scrub off.
Buying a bulk pack of lids when you find a reliable source can also help prevent stretching old stock simply because you're running low on fresh supplies.
What to Do With Lids and Rings That Don't Pass Inspection
Once you've sorted out the rings and lids that failed your check, don't just toss them in a junk drawer for later.
Rusted or damaged rings can be separated from your active canning supplies so they aren't accidentally returned to rotation. Used or damaged lids can be reserved for appropriate non-canning purposes rather than being trusted for another preservation cycle.
If you're finding that a large chunk of your stock is failing inspection every season, it might be time to look at how you're storing everything rather than just replacing what's damaged.
A dry, temperature-stable spot away from direct sunlight will always outperform a damp basement shelf or hot garage. If you're restocking from scratch, a lids and rings bundle gives you a matched, fresh starting point instead of guessing at what's still usable in your current stash.
Building a Quick Pre-Canning Inspection Habit
The easiest way to make this stick is to build it into your prep routine instead of treating it as an extra step.
Set out your jars, lids, and rings before you start heating anything, and sort through them while you wait for your other prep work to finish. That way the inspection happens naturally instead of getting skipped when you're rushing to keep up with a full batch of produce.
Keep a small container nearby for anything that fails the check, whether that's a rusted ring or a lid with a compromised seal, so you're not tempted to second-guess a decision you already made.
Good lids and rings are inexpensive compared with the cost of a spoiled batch, so treat the inspection step as part of your normal canning routine. A quick check before filling jars, paired with a seal check after processing, gives you one more layer of confidence before food reaches the pantry.
Restock Before the Harvest Arrives
Get fresh lids, rings, replacement parts, and other canning essentials ready before you're standing in the kitchen with a full batch waiting.
Shop Denali Canning →Frequently Asked Questions
1. How often should I replace canning rings?
Rings can last for several years with normal use, but you should replace one as soon as it shows rust, dents, or won't sit flat anymore. A ring that's out of shape puts uneven pressure on the lid, which raises your chances of a failed seal. When in doubt, swap it out; rings are inexpensive compared to a lost batch.
2. Can I reuse a canning lid once it's been sealed?
No. The sealing compound on a canning lid is designed to compress once against the jar rim, and it won't create a reliable seal a second time. Save used lids for appropriate non-canning purposes rather than returning them to your active canning supplies.
3. What does a bad seal on a canning lid look like?
A lid that hasn't sealed properly may flex or pop back up when you press the center rather than staying firm. If a jar does not seal after cooling, treat it separately from jars that passed your seal check.
4. Is a little surface rust on a ring a dealbreaker?
Visible rust is a good reason to retire a ring from active canning. Rust can weaken the metal over time, and replacing a questionable ring is inexpensive compared with risking problems during a batch.
5. How long do unused canning lids stay good in storage?
Your article recommends using around five years as a general guideline when lids have been kept in a cool, dry place. If you're uncertain how old a box is, inspect the sealing compound and overall condition carefully before use.
6. What should I do if a jar doesn't seal after processing?
Separate the unsealed jar from the successful batch immediately. Your article recommends refrigerating it for prompt use or reprocessing it appropriately with a new lid rather than attempting to reuse the failed lid.




Comments (0)
There are no comments for this article. Be the first one to leave a message!