
Creating homemade cranberry juice is not only a fun kitchen project but also an excellent way to enjoy the tart, refreshing flavor of cranberries all year round. This step-by-step guide provides you with everything you need to know to water bath can your cranberry juice using The Tanker by Denali, ensuring your pantry is stocked with this vibrant, nutritious beverage. Here's how to do it:
Ingredients and Tools:
- Fresh Cranberries: The star of our recipe. Cranberries are not only delicious but packed with antioxidants.
- Oranges or Lemons: For a hint of citrus to balance the tartness of the cranberries.
- Sugar: To sweeten the juice according to your taste.
- Water: The liquid base for extracting the juice from the cranberries.
For the canning process:
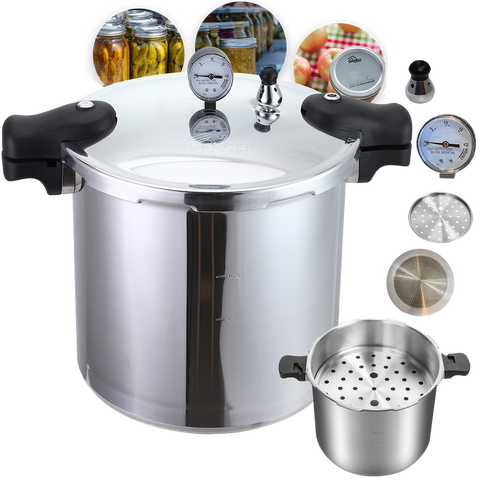
- Pressure canner (used here as a water bath canner)
- Jars, lids, and rings
- Jar lifter and funnel for easy handling and filling
Preparation:
- Cooking the Cranberries: Combine cranberries and water in a large pot. The ratio is simple: for every 1 cup of cranberries, add 3 cups of water. For this recipe, we used 4 cups of cranberries and therefore added 12 cups of water.
- Sweetening the Mix: Add sugar and the juice of one orange (minus the seeds) for every cup of cranberries used. Here, we quadrupled the recipe to make a larger batch, adjusting the sugar and orange juice accordingly.
- Boil and Break Down: Bring the mixture to a boil. The cranberries will begin to pop open and break down, infusing the water with their flavor and color.
- Taste and Adjust: Once the cranberries have fully broken down, taste the mixture and adjust the sweetness if necessary.
- Straining: Use a fine mesh strainer to remove the cranberry solids from the juice. Don't discard the solids; they can be repurposed into delicious fruit leathers or other recipes.
Canning Process:
- Filling the Jars: With a funnel, carefully pour the strained juice into your jars, leaving a quarter-inch headspace. This space is crucial for high-acid foods like cranberry juice, allowing for safe water bath canning.
- Cleaning and Sealing: Wipe the jar rims with a vinegar-dipped cloth to ensure a clean seal. Place the lids on the jars and tighten the rings until fingertip tight.
- Water Bath Canning: Place the jars in the canner, filled with hot water to cover them by 1-2 inches. Add a splash of white vinegar to the water to prevent mineral build-up on the jars. Remove the pressure canner’s weight to convert it into a water bath canner.
- Processing Time: Once the water boils, process pint jars for 10 minutes and quart jars for 15 minutes.
- Cooling: After processing, remove the jars from the canner and let them cool undisturbed for 12-24 hours to ensure a proper seal.
Enjoying Your Cranberry Juice
Once cooled, check the seals by removing the rings and gently lifting the jars by the lid. A properly sealed jar will remain tightly closed. If any jars haven't sealed, refrigerate and consume them within a few days.
Homemade cranberry juice is not only a healthier alternative to store-bought versions but also a rewarding way to practice and enjoy the art of canning. With its bright color and refreshing taste, it's sure to be a hit with family and friends. Whether enjoyed on its own or mixed into cocktails or other beverages, this cranberry juice will be a versatile addition to your homemade pantry.
For those looking to see this process in action, including tips on adjusting sweetness and ensuring a proper seal, our video tutorial provides a visual guide to making and canning cranberry juice at home.


Comments (0)
There are no comments for this article. Be the first one to leave a message!