
You did everything by the book, or so it seemed. Jars washed, filled, wiped down, processed for the full time. Then the next morning, a few lids are still flat instead of popped down, or they seal just fine and pop back up again by afternoon. Failed seals are one of the most frustrating parts of home canning, and they almost never come down to bad luck. That's especially true if you've already spent an afternoon peeling, chopping, and processing a full harvest. Most trace back to the same handful of mistakes with canning supplies: the wrong lid, the wrong headspace, a band cranked too tight, or a canner that wasn't quite ready. Fix those, and a sealed jar stops being a coin flip and starts being the expected result every time.
Here's what actually goes wrong most often, and how to avoid it before your next canning session.
Explore Denali Canning Supplies
Stock up on canning essentials before processing day so damaged or missing supplies don't slow down your batch.
Shop Canning Supplies →Canning Supplies Prep Mistakes That Break the Seal Before You Start
A lot of seal failures are decided before the jar ever goes into the canner. The prep stage is where small shortcuts turn into a whole batch of unsealed jars.
Reusing Lids You've Already Sealed Once
Standard two-piece metal lids are built for one use. The sealing compound around the edge is soft enough to mold itself against the jar rim exactly once, under heat, and it doesn't reset once that seal is broken. Pop the lid off to check on a jar, or scrape together mismatched lids left over from last season, and you're working with a compound that's already been compressed and won't form a reliable seal a second time. It's a small cost to buy fresh canning jar lids every season, and it's a lot cheaper than losing a batch of tomatoes to spoilage. Rings can be reused for years since they never touch the food or the seal itself, but the flat lids are single-use. Keep a small stock of unused canning jar lids on hand so a mid-batch reach for "just one more" never turns into a reused one.
Skipping the Rim Wipe
A stray drip of syrup, brine, or tomato juice on the jar rim is enough to keep a lid from making full contact. It doesn't take much. A film you can barely see is still a gap the sealing compound can't close. Run a clean, damp cloth around the entire rim right before the lid goes on, every jar, every time.
Canning With a Chipped or Cracked Jar
Hairline cracks and small chips along the rim are easy to miss under running water, but they create a surface the lid can't seal against no matter how carefully everything else is done. Run a finger around the rim of every jar before filling it. A quick glance often misses what a fingertip catches right away.
Four Things Worth Inspecting Before Processing
A quick supply check can catch several common causes of seal failure before jars ever enter the canner.
Headspace and Band Mistakes
Headspace and band tension are two of the most common places a canning session goes sideways, and both are easy to get right once you know the target.
Getting Headspace Wrong
Headspace is the gap between the top of the food and the rim of the jar, and it isn't a guess-and-check measurement. Too little headspace and food can bubble up during processing and sit on the rim, blocking the seal. Too much headspace and the jar may not draw enough of a vacuum to seal at all. Both mistakes are common with new recipes or repurposed containers where the fill line isn't obvious.
Headspace by Recipe Type
Jams and jellies generally need about 1/4 inch. Fruits, tomatoes, and pickles typically call for 1/2 inch. Low-acid vegetables, meats, and anything going through a pressure canner usually need a full inch. A basic canning ruler, the kind that comes in most starter kits, takes the guesswork out entirely.
Over-Tightening or Re-Tightening the Bands
Bands should be fingertip tight: snug enough to hold the lid in place, not cranked down with any real force. Air and steam need to escape from under the lid during processing for a vacuum to form, and an overtightened band can trap it. Just as common is re-tightening the band after processing. Once jars come out of the canner and a band looks a little loose, it's tempting to snug it back down. Don't. The seal is still forming during that cooling window, and disturbing it can break the vacuum before it fully sets. A fresh set of canning rings each season, free of rust or warping, makes it easier to tell what fingertip tight actually feels like.
Read the Denali Lids & Rings Guide
Learn more about how two-piece lids work, when rings can be reused, and what to inspect before your next batch.
Read the Lids & Rings Guide →Pressure Canner Mistakes That Undercut the Seal
For low-acid foods, the canner itself has to perform, and a couple of overlooked canning supplies do a lot of that work.
A Worn or Dirty Gasket
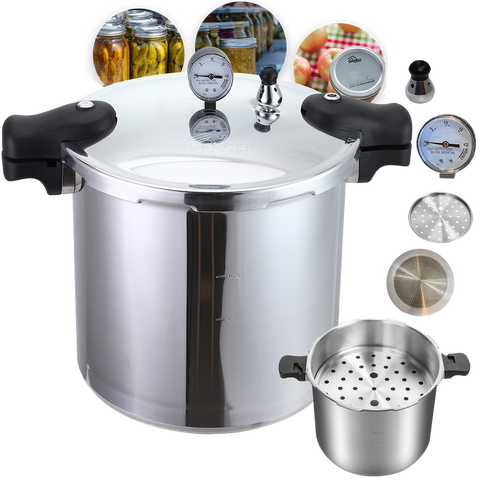
The rubber gasket that seals the canner's lid has to make an airtight connection for the unit to reach and hold pressure. A gasket that's cracked, stretched, or coated in old food residue can leak just enough pressure that the canner never quite gets jars hot enough for a safe seal, even if the timer runs the full length. Wipe it down after every use and check it at the start of each season. A gasket that still looks smooth and flexible is usually fine; one that feels stiff or looks glazed or cracked should be replaced before it costs you a batch. A replacement gasket is inexpensive compared to reprocessing a lost batch.
Skipping the Altitude Adjustment
Processing times and pressures are calculated for sea level, and they change as elevation increases. Skip the altitude adjustment and jars can come out under-processed, which sometimes shows up as a seal that looks fine on day one and fails within a week. A reliable pressure canner with an accurate gauge, checked yearly against a weighted tester or by the manufacturer, takes one variable off the table.
Explore the Denali Replacement Gasket
If your pressure canner gasket is cracked, stiff, stretched, or no longer sealing properly, inspect it before your next processing day.
View Replacement Gasket →After-Processing Mistakes
The moment jars come out of the canner or the water bath, it's tempting to rush. That's usually where a fixable mistake turns into a failed seal.
Moving or Inverting Jars Too Soon
Jars need to sit undisturbed for 12 to 24 hours while they cool and the vacuum forms. Tilting them, sliding them across the counter, or flipping them upside down (an old habit some canners still swear by) can shift the lid before the seal sets and lead to a false or failed seal.
Skipping the 24-Hour Seal Check
Once jars have cooled fully, press the center of each lid. It shouldn't flex or click. Any lid that gives should go straight in the fridge for near-term use rather than the pantry shelf.
Getting It Right, Batch After Batch
None of these mistakes call for new equipment or a steeper learning curve, just a closer look at the canning supplies already on the counter and a little patience during the parts that are easy to rush. Denali Canning builds its canning supplies around exactly these failure points, so lids, rings, and pressure canners work with you instead of against you. Slow down on rim wipes, headspace, and band tension, and the mystery mostly disappears.
Explore More Denali Canning Guides
Read more about pressure canning, supplies, maintenance, lids, rings, and practical ways to prepare for a safer canning day.
Read Canning Guides →FAQs
1. Why won't my canning jars seal even after a full processing time?
Most unsealed jars come down to a rim that wasn't wiped clean, a chipped jar, or a band that was too tight to let air escape. Check those three first before assuming the recipe or the processing time was the problem.
2. Can I reuse canning jar lids?
No. The sealing compound on standard two-piece lids only molds properly once. Reused lids can look fine but often fail to hold a vacuum, so it's worth buying a fresh set each canning season rather than risking a spoiled batch.
3. How do I know if a jar is sealed correctly?
Once jars have cooled for 12 to 24 hours, press the center of the lid. A properly sealed lid stays flat and doesn't flex or click. If it pops up and down, the seal didn't take and the jar needs to be refrigerated or reprocessed.
4. What should I do if a jar doesn't seal?
Move it straight to the refrigerator and use the contents within a few days, or reprocess it with a new lid within 24 hours. Don't try to save an unsealed jar on the pantry shelf.
5. Should I tighten the bands after taking jars out of the canner?
No. Leave bands exactly as they are once jars come out of the canner. The seal is still forming during cooling, and retightening a band that looks loose can break the vacuum before it fully sets.
6. Does the pressure canner gasket really affect whether jars seal?
Yes. A cracked, stretched, or dirty gasket can leak enough pressure that the canner never reaches full processing temperature, even if the timer runs the whole time. Check it before every canning season.




Comments (0)
There are no comments for this article. Be the first one to leave a message!