There's a moment on every canning day when you realize the bottleneck isn't the canner. It's the ten minutes you spend fishing hot jars out of water with a pair of tongs, or the second batch you can't start because the rack is still cooling. The right pressure canner accessories eliminate those small stalls. Not all of them are worth buying, though, and the marketing around canning gear is thick. Here are the five that genuinely change how a canning session runs, plus how to tell whether you actually need each one.
Explore Denali Canning Supplies
Browse pressure canning accessories, replacement parts, and preservation supplies for your setup.
Explore Canning Supplies →1. A Second Canning Rack
If you buy one accessory, make it this.
Why one rack becomes a bottleneck
The rack that came with your canner is in use the entire time a batch processes, and it's still hot when that batch comes out. With a single rack, your second load waits while the first one cools. With two, you load the next batch immediately and the canner never sits idle.
What to look for
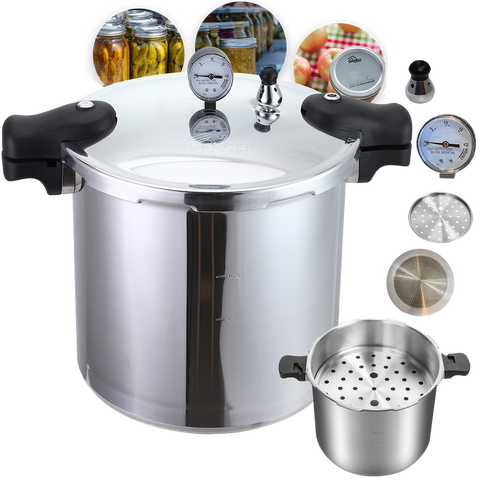
Rack quality varies more than you'd expect. You want a design that keeps jars fully off the bottom surface, resists warping under repeated heat cycles, and fits your canner's exact diameter. A large extra canning rack sized for your specific model beats a generic one that shifts around and lets jars tip.
Stacking for double batches
Some canners hold two layers of pint jars with a rack between them. If yours does, a second rack literally doubles your output per cycle. A two-pack of canning racks covers both the stacking use and the swap-and-go workflow at once.
A More Efficient Pressure Canning Station
The most useful accessories are the ones that remove delays, make handling safer, or help you follow tested processing instructions more accurately.
2. Alternate Pressure Weights
One weight limits what you can safely process.
Matching pressure to recipe and altitude
Tested recipes call for specific pressures, and altitude adjustments push those numbers higher. If your canner shipped with a 15-pound weight only, you're processing everything at maximum pressure whether the recipe calls for it or not. That means longer come-up times, more fuel, and unnecessary stress on your seals.
Building a small set
Having a 5-pound and 10-pound option alongside your 15 gives you full recipe flexibility. Adding a 5-pound valve and weight is the least expensive way to expand what your canner can handle, and it takes about thirty seconds to swap.
A note on custom vents
Some canners pair each weight with its own vent piece rather than using a universal pipe. Check whether yours does before ordering, since the weight alone won't fit if your model expects a matched set.
Explore Denali Pressure Components
Review replacement and alternate pressure-control parts made for Denali canners before adding anything to your setup.
View the 10 lb Pressure Weight →3. A Proper Jar Lifter
Tongs are not a jar lifter. They will teach you this the hard way.
What makes a good one
A real jar lifter has rubber-coated jaws shaped to grip the curve just below the jar's neck, and enough leverage that a full quart doesn't slip when you lift it out of near-boiling water. The cheap ones flex under load, which is exactly when you don't want flex.
The safety argument
Dropping a hot jar means broken glass, scalding liquid, and lost food all at once. This is the accessory that pays for itself the first time it prevents that. It's also the one people most often try to skip, usually right up until the first close call on canning day.
4. A Headspace Tool and Bubble Remover
The small plastic stick that looks like an afterthought does two important jobs.
Getting headspace right
Headspace is the gap between food and the lid, and it directly affects whether jars seal. Too little and food forces its way past the seal during processing. Too much and you're left with excess air that can cause discoloration and seal failure over time. Guessing by eye works until it doesn't.
Releasing trapped air
The flat end slides down the inside of the jar to release air pockets hiding in thick foods like chili, beans, or pumpkin. Trapped bubbles mean your actual fill level changes during processing, which throws off the headspace you carefully measured. Denali Canning and most tested recipe sources treat this step as non-optional for a reason.
Explore Canning Bundles
See bundled Denali options designed to bring together core canning equipment and useful accessories in one setup.
Browse Canning Bundles →5. Backup Lids and Rings
Running out mid-session is the most avoidable problem in canning.
Why lids are the true consumable
Rings are reusable indefinitely if they stay clean and rust-free. Flat lids are single-use for sealing, so every jar you fill consumes one permanently. Most people underestimate how fast a productive afternoon burns through them.
Buying ahead
Stocking a season's worth in advance costs less per unit and removes the mid-batch supply run entirely. It's worth reviewing what's available across the full canning appliance and equipment range at the same time, since ordering everything together usually clears free shipping thresholds anyway.
Sizing matters
Regular mouth and wide mouth aren't interchangeable. If you run both jar types, keep both on hand and store them separately so you're not sorting under pressure.
What You Can Skip
Not every gadget earns counter space. Magnetic lid wands are convenient but a clean pair of tongs does the same job. Specialty funnels help with narrow jars but aren't essential if you pour carefully. Electric jar sterilizers solve a problem that boiling water already solves for free.
The pressure canner accessories worth buying are the ones that remove a bottleneck, prevent an injury, or protect a batch. Everything on the list above does at least one of those three things.
Setting Up Your Station
Lay everything out before you heat a single jar. Racks stacked and ready, weights within reach, lifter and headspace tool beside the fill station, lids and rings counted out for the batch size you're running.
A well-stocked setup turns canning day from a scramble into a rhythm. Start with a second rack and a solid jar lifter, then add the rest as your batches get bigger. You'll notice the difference by the second load.
Explore Denali's Pressure Canning Guides
Read more about equipment, supplies, lids, maintenance, pressure canning, and safe home food preservation.
Read Canning Guides →FAQs
1. Do I really need a second canning rack?
You don't need one, but it roughly halves your total time on multi-batch days. A single rack forces you to wait for it to cool before reloading. If you regularly process more than one canner load in a session, it's the highest-value accessory on the list.
2. Can I use any jar lifter with any canner?
Yes, jar lifters are universal and not tied to a specific canner model. What matters is grip quality and jaw shape rather than brand matching. Choose one with rubberized, contoured jaws and enough rigidity that it doesn't splay under a full quart jar.
3. Are canning rings reusable?
Rings are reusable as long as they stay round, clean, and free of rust or bending. Flat lids are the single-use component and must be replaced every time you seal a jar. Inspect rings before each batch and retire any that are warped or corroded.
4. What headspace should I leave in my jars?
It depends entirely on the food, so follow your tested recipe. As a general reference, pressure-canned vegetables and meats typically call for one inch. Using a headspace tool rather than estimating removes a common cause of seal failure.
5. Do I need different weights for different recipes?
Often yes. Tested recipes specify processing pressure, and your altitude may require an adjustment upward. Owning weights at multiple pressure ratings lets you follow recipes exactly instead of over-processing everything at the highest setting.
6. How many lids should I keep on hand for a season?
Estimate your total jars for the season and add about twenty percent for retries and unexpected harvests. Most home canners underestimate significantly. Lids store indefinitely in a cool dry place, so buying ahead carries almost no downside.




Comments (0)
There are no comments for this article. Be the first one to leave a message!