
Canning supplies have a way of multiplying every season, until jars, lids, rings, racks, and tools are scattered across three different cabinets and a shelf in the garage. A little organization up front saves a lot of searching later, especially mid-batch when you need a specific ring size and do not want to dig through four boxes to find it. Setting up your canning supplies properly, and storing them the right way between seasons, keeps everything ready to grab and keeps metal parts from rusting out before you even get to use them again. None of it requires fancy storage or a dedicated room, just a system that matches how a canning day actually unfolds. Here is how to actually organize what you already have.
What Counts as "Canning Supplies" in the First Place?
Before anything gets organized, it helps to know what you are actually organizing, since the list is longer than most people picture at first.
The Core Pieces Everyone Needs
Jars, lids, and rings are the obvious three, but the canner itself, along with its rack, rounds out the core setup. Everything else exists to support that short list: a jar lifter, a wide-mouth funnel, a magnetic lid wand, and a bubble remover or headspace tool. None of these extras are expensive, but a canning day without one of them usually means improvising with kitchen tongs and hoping for the best.
The Small Tools That Go Missing First
The small tools are the ones that vanish first, usually because they get tossed in a junk drawer instead of a dedicated spot. A funnel or jar lifter that goes missing mid-batch is a bigger headache than it should be, which is exactly why a system matters more for the small stuff than for the jars themselves. A small zippered pouch or a single labeled drawer keeps every one of these together, so a search for the jar lifter never turns into a search through three different drawers.
Missing Something From Your Canning Setup?
Browse Denali canning supplies, replacement parts, lids, rings, racks, and other essentials before your next batch.
Shop Canning SuppliesBuilding a Canning Station That Works
A canning station does not need its own room. It just needs everything grouped so a canning day does not start with a search.
Group Supplies by Task, Not by Type
Instead of sorting by category, sort by what happens first, second, and third during a canning session: wash and prep tools in one bin, jars and closures in another, and processing tools like the lifter and timer in a third. That order matches how a canning day actually unfolds, so reaching for the next thing never means walking to a different room. If counter space is tight, even three labeled totes stacked near the stove accomplish the same thing as a built-in pantry wall.
Give the Canner Its Own Spot
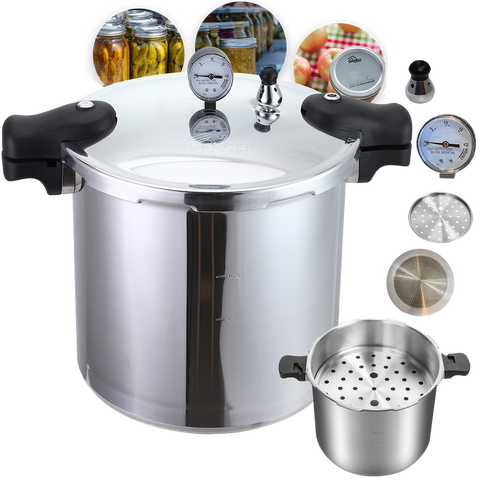
The canner is too big to store with the small stuff, so it deserves one consistent spot, whether that is a lower cabinet, a pantry shelf, or a spot in the garage. A replacement gasket and a spare rack kept right next to it means nothing extra needs to be tracked down before a batch can start. Even a simple shelf label naming what belongs there keeps anyone else in the house from "borrowing" the spot for something unrelated.
Storing It Between Seasons
Off season, store the canner with its lid off rather than sealed shut. A closed lid traps moisture inside and can leave the gasket compressed in one position for months, which shortens its life. A quick wipe-down before it goes into storage also keeps anything acidic from a prior batch from sitting against the metal all winter. If the canner lives somewhere dusty, like a garage shelf, a simple cloth cover or an old pillowcase over the top keeps it clean without sealing in any moisture the way a lid would.
Organizing Lids and Rings So Nothing Goes to Waste
Lids and rings cause more mid-batch scrambling than anything else, mostly because regular mouth and wide mouth look similar enough to grab the wrong one without noticing.
Label by Mouth Size Before You Need To
Labeling bins by mouth size the day a bulk order arrives saves a lot of guessing later. A 24-pack of regular mouth lids looks almost identical to its wide mouth counterpart once it is out of the original packaging, so a clear label on the bin matters more than the packaging ever will. Writing the mouth size in large letters on the outside of the container, rather than relying on the small print on the lids themselves, saves a trip back to the kitchen mid-batch to double-check.
Don't Let Lids and Rings Share a Bin
Rings and lids wear differently and get used at different rates, so mixing them in one container just makes inventory harder to track at a glance. Keeping a pack of wide mouth rings in its own labeled bin makes it obvious at a glance how much is left before the next bulk order is due, without digging past a pile of lids to check. A clear or labeled bin works better than an opaque one here, since a glance through the lid tells you more than a label alone ever could.
Restock Before the Next Batch Starts
Denali offers regular-mouth and wide-mouth rings, lid packs, combination bundles, and larger case quantities for busy canning seasons.
Browse Lids & RingsProtecting Metal Parts From Rust and Wear
Rust is the real threat to anything metal in a canning setup, and most of it comes down to how things are stored between uses rather than how they are used.
Keep Rings and Racks Dry
Rings should go back into storage completely dry, never while still damp from the dishwasher or a sink of soapy water. A closed container keeps humidity out better than an open shelf, especially in a garage or basement where moisture swings with the weather. A silica packet or two tossed into the bin, the kind that come with new shoes or bags, adds a little extra insurance against rust in a damp space. Anyone building this whole setup from scratch is usually better off starting with a complete lids and rings bundle so every piece lands in storage at the same time instead of trickling in from separate orders.
Check the Gasket Before It Goes Back in the Box
A gasket that gets packed away stiff or cracked will not improve by sitting in a box until next season. Give it a quick check before storage, not just before the first use of the next year, so there is time to replace it while the canner is not actually needed. A gasket that still looks smooth and flexible can go straight back in the box, while one that feels stiff or glazed is worth replacing now rather than discovering the problem mid-season.
Useful Replacement Parts to Keep on Hand
A few spare parts stored beside the canner can prevent a small maintenance problem from stopping an entire canning day.
Check Your Canner Before the Season Starts
Browse replacement gaskets, canning racks, and compatible pressure canner parts before you need them mid-batch.
View Canner PartsA well-organized canning station mostly just means everything has one home, and that home makes sense for how the supplies actually get used. Denali Canning's full lineup of canning supplies is worth a look whenever a bin comes up short, whether that is a missing lid size or a ring stock that quietly ran out. Sort once, label clearly, and next season starts without the scavenger hunt.
Build a Canning Setup That Stays Ready
Explore Denali’s canners, lids, rings, racks, replacement parts, and other home-preservation supplies in one place.
Explore Denali Canning



Comments (0)
There are no comments for this article. Be the first one to leave a message!